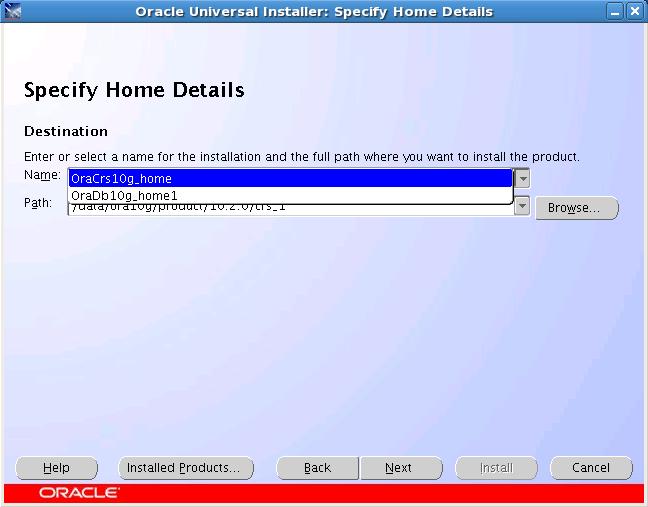
首先以oracle用户登陆到视窗界面(如果以root用户登陆后su到oracle下的话,注意设置环境变量DISPLAY,或在执行su命令前执行xhost +命令),找到补丁包的路径,执行runInstaller即可:
[root@jssdbn1 ~]# xhost +
access control disabled, clients can connect from any host
[root@jssdbn1 ~]# su - oracle
[oracle@jssdbn1 ~]$ cd /data/software/oraupdate/Disk1/
[oracle@jssdbn1 Disk1]$ ./runInstaller
Starting Oracle Universal Installer...
Checking installer requirements...
Checking operating system version: must be redhat-3, SuSE-9, redhat-4, UnitedLinux-1.0, asianux-1 or asianux-2
Passed
.........................
.........................
[root@jssdbn1 software]# /data/ora10g/product/10.2.0/crs_1/bin/crsctl stop crs
Stopping resources.
Successfully stopped CRS resources
Stopping CSSD.
Shutting down CSS daemon.
Shutdown request successfully issued.
[root@jssdbn1 software]# /data/ora10g/product/10.2.0/crs_1/install/root102.sh
Creating pre-patch directory for saving pre-patch clusterware files
Completed patching clusterware files to /data/ora10g/product/10.2.0/crs_1
Relinking some shared libraries.
Relinking of patched files is complete.
WARNING: directory ¨/data/ora10g/product/10.2.0¨ is not owned by root
WARNING: directory ¨/data/ora10g/product¨ is not owned by root
WARNING: directory ¨/data/ora10g¨ is not owned by root
WARNING: directory ¨/data¨ is not owned by root
Preparing to recopy patched init and RC scripts.
Recopying init and RC scripts.
Startup will be queued to init within 30 seconds.
Starting up the CRS daemons.
Waiting for the patched CRS daemons to start.
This may take a while on some systems.
.
10204 patch successfully applied.
clscfg: EXISTING configuration version 3 detected.
clscfg: version 3 is 10G Release 2.
Successfully accumulated necessary OCR keys.
Using ports: CSS=49895 CRS=49896 EVMC=49898 and EVMR=49897.
node :
node 1: jssdbn1 jssdbn1-priv jssdbn1
Creating OCR keys for user ¨root¨, privgrp ¨root¨..
Operation successful.
clscfg -upgrade completed successfully
[root@jssdbn2 ~]# /data/ora10g/product/10.2.0/crs_1/bin/crsctl stop crs
Stopping resources.
Successfully stopped CRS resources
Stopping CSSD.
Shutting down CSS daemon.
Shutdown request successfully issued.
[root@jssdbn2 ~]# /data/ora10g/product/10.2.0/crs_1/install/root102.sh
Creating pre-patch directory for saving pre-patch clusterware files
Completed patching clusterware files to /data/ora10g/product/10.2.0/crs_1
Relinking some shared libraries.
Relinking of patched files is complete.
WARNING: directory ¨/data/ora10g/product/10.2.0¨ is not owned by root
WARNING: directory ¨/data/ora10g/product¨ is not owned by root
WARNING: directory ¨/data/ora10g¨ is not owned by root
WARNING: directory ¨/data¨ is not owned by root
Preparing to recopy patched init and RC scripts.
Recopying init and RC scripts.
Startup will be queued to init within 30 seconds.
Starting up the CRS daemons.
Waiting for the patched CRS daemons to start.
This may take a while on some systems.
.
10204 patch successfully applied.
clscfg: EXISTING configuration version 3 detected.
clscfg: version 3 is 10G Release 2.
Successfully accumulated necessary OCR keys.
Using ports: CSS=49895 CRS=49896 EVMC=49898 and EVMR=49897.
node :
node 2: jssdbn2 jssdbn2-priv jssdbn2
Creating OCR keys for user ¨root¨, privgrp ¨root¨..
Operation successful.
clscfg -upgrade completed successfully